This is an old revision of the document!
Universal Robots UR10 robot arm
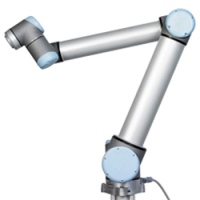
Collaborative robot-arm
A Geometric Inverse Kinematics Solution for the Universal Robot
Applications
Software
UR_Playground
Universal Robot Software meant to introduce students to the artistic and experimental aspects of working with robots.
Github page
RoboDK
Grasshopper
Grasshopper runs inside Rhino 7. In order to control the robot arm, a plugin is needed:
The Robots plugin
Installation
Install 'Robots' plugin (on Mac) for Grasshopper on Rhino 7:
- Download the last release of the plugin: https://github.com/visose/Robots/releases.
- In Grasshopper, go to 'File > Special Folders > Components Folder'. This opens a finder window.
- Put the downloaded files ('Robots.dll', and 'Robots.gha') in this folder.
- Instructions were given to Windows users to give write permission to the files. Not sure if it applies to MacOS too.
- Download the zip file from this Github repository: https://github.com/visose/Robots: on the top right, click 'code > download .zip'. Alt+click to download individual files doesn't work as it results in HTML files instead of the raw xml files.
- Unzip the file. A folder 'Robots-master' is created.
- Make a folder called 'Robots' in your user directory ('/Users/username/Robots').
- Move the contents from 'Robots-master > Libraries' to the newly created 'Robots' folder in the user directory.
Guides
- There are a few example files in ('Robots-master > Documentation > Examples')
- I followed this getting started video.
- Robots guide by Fab Lab Barcelona (almost a complete copy from Robots How-To-Use).
- Drawing with robots video tutorial. Uses KukaPRC instead of 'Robots', but workflow might be useful.
I tried adapting the 'simple example' by changing the Kuka robot to a UR10 robot. It works, but the initial position is all wrong. In this guide Joonhaeng Lee at MIT's center for bits and atoms describes a solution to this problem.
URRealtimeFeedback plugin for Robots
This is a grasshopper file with some builtin scripts that allows to receive the current pose of the robot arm.
FTP connection
- Use FIleZilla
- Host:
sftp://192.168.185.99 - Username: root
- Password: easybot
- Port: 22 (also works without entering anything here)
Location of program (URP) or script (URS) files: /programs
Toolhead connector
A suitable cable that mates to the toolhead connector is Lumberg RKMV 8-354
future tool heads
- 3D scanner tool head
Broom handle attachment


3D print attachment
In development

Pen plotter attachment

Webcam attachment


DSLR attachment
Hole drilling attachment


This tool head turns the robot into an automated hole drilling machine. Good for elaborate hole patterns that would be tedious to do manually.
Based on this design.
The 3D printed part attaches to a Grip toolchanger underplate (G-MGW063-2U).
Download the 3D files here.
Attach the clamps to the largest part with M4 screws and nuts.
Attach the largest part to the tool changer with 4 M5x16 low profile bolts and 4 M4 nuts