Your first print
Formlab todo: add more pictures
1. Prepare the printer
- Power on
- Turn on the computer.
- Turn on the power supply on the left side of the machine.
- Turn on the machine by pressing the round metal power-button on the left bottom of the front panel:

- Make connection
- Open Repetrel on the computer (Repetrel is not running on the tablet anymore).
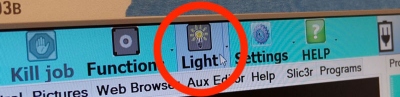
- Test the connection by clicking on the
Lightbutton on top of the Repetrel UI:
- Home the X and Y axes
- You NEED to home the machine before starting any other motion
- click on the
Home X-Ybutton. - We will home the Z axis later


2. Prepare the material
- Have a cylinder filled plasticine on hand. If not, load the plasticine yourself
- Make sure it has a nozzle diameter of 1.5mm.
- Attach it to the
EMO-25tool head. - Rub a little plasticine on the bed (for adhesion)
3. Set up Repetrel
- Install the tool head in slot 2 of the yoke
- Check Repetrel control panel to check if the head is recognised. If so, the buttons in slot 2 light up.
- Repetrel is the software that slices the 3D model and controls the printer.
- Home the Z-axis (Set extruder head height).
- Put a piece of paper under the nozzle.
- Click
Enable Z-calibrate. When the button is red and the arrow on it's right is lit up yellow, It is now possible to carefully raise the bed to the nozzle.- The arrows show the motion from the perspective of the table:
- UP = closer to the nozzle
- DOWN = further away from the nozzle
- Raise the bed until the paper is lightly pinched between the nozzle and the bed.
- Un-click
Enable Z-calibrationto set the current position as Z-ZERO.
- Set nozzle diameter to 1.5mm in the head-control section (picture)
3. Load 3D model
- Click the big button:
Object > Add STL file > Open STL& go toDesktop > TEST SHAPESand selectFormlab testcylinder.stl. - Offsets-tab.
- Click the round target button to center it on the print bed.
- Print-tab: select the desired Slic3r profiles.
- Print:
Formlab Plasticine Default. Check if filename is correct - Printer:
Unheated head. - Extruder 2:
No heat, no fan, no bed.
- Click the big
Processbutton & selectSlice with Slic3r.
4. Start the print
- Prime a little material.
- When the G-code preview looks good, click
Print- Use
Z fine adjust(Z+= bed closer to nozzle,Z-= bed further away from nozzle) - Use
Kill Jobwhen you want to stop the test.