This is an old revision of the document!
Universal Robots UR10 robot arm
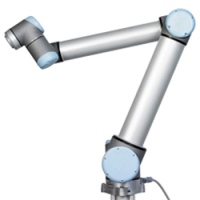
Collaborative robot-arm
Applications
future tool heads
- 3D scanner tool head
Brush attachment
3D print attachment
In development
Pen plotter attachment
Webcam attachment
DSLR attachment
Hole drilling attachment

Based on this design on Thigyverse.
Drilling holes in a grid
This tool head was made to drill a grid of 495 holes into the base plate of the thermoform machine.
Physicial setup
The program is made and executed on the teaching pendant.

The Dremel is strapped to the upper arm of the robot and secured with zip ties, using a curved block of foam.

Slide the Dremel flex-arm in the 3D printed holder. Make sure it is attached to the tool change plate. Check that the bolt-heads are not sticking out on the side that will mount to the robot arm. The tool changer needs low profile bolts. Attach the tool to the robot arm and install a 1mm drill in the chuck.

I had a piece of wood on a table with a layer of thick cardboard underneath, but with the robot arm, it is possible to drill in walls, upright panels etc… (The cardboard in the picture should have been thicker).
Define the coordinate system of the stock material

Test the reach of the arm: can it get to the far corners?

To define the coordinate system of the stock material, take the teaching pendant and go to Installation > Features.
- Add a plane and define the necessary points. In this case these are the corners of the sheet of MDF.
- First point: this defines the origin of the feature.
- Second point: this defines the Y axis.
- Third point: this defines the X axis.
Save the file with a clear name.
Define the grid
In this example, the drill makes a grid of 495 holes. The program is based on a wizard for palletizing.
On the teaching pendant, load the following program: File > Load > drilling holes in a grid v2 (palletizing).urp.
Let's define 4 points where the outer most actions of the palletising sequence will take place. These points will become the corner-holes.

In the program tree, click item a1st Corner_1
Click change this position

From the upper right drop down menu, select the feature you defined previously.

To make the drill point straight down, click on one of the number boxes under TCP. A new screen opens.

Change drop down menu Rotation vector [rad] to Rotation Vector [°].
- Set RX to
0 - Set RY to
0 - Set RZ to
180(this is the rotation of the Z-axis, so the value probably doesn't matter)

Lower the speed for safety.
Manually move the arm to the first position, using the on screen arrows.

When arrived at the first position, carefully move the arm down so that the drill almost touches the wooden surface. Keep a millimeter of safety margin.
Click OK and define the 3 other points too.
Define the drilling sequence
This is the sequence to drill a single hole. When running the program, it will be repeated for every hole. We will only be defining heights, since the X-Y location will be taken from the grid locations later.

Under PalletSequence, select PatternPoint_1. Click Change Position and move the point of the drill to one of the edges of the wooden plate, so the drill can go down without touching the wood. This way we can clearly see how deep we should drill.
Position the drill about 1mm above the surface.

Define approach position: a few cm’s higher than PatternPoint_1, so the robot arm can move safely above the work surface.

- Define Down —>
From point: set to the position ofPatternPoint_1. This will be the start of the drilling move. - Define Down —>
To point: move the arm down until the drill is just a bit below the bottom of the wooden plate. This is how deep we will drill. - Define Up —>
From point: set to the bottom position of the drill operation. This is where our retract move will start. - Define Up —>
To point: set to the position ofapproach. This is the end of our retract move. - Define
Exit: set to the position ofapproach.
Define the pattern

In the program outline, select pattern: square and set the amount of operations on the two sides of the rectangle in order to define the density of the grid.

In the program outline, select Loop and set its value to the amount of operations on side 1 times the amount of operations on side 2.
For example: 33×15 = 495

- Set the speed slider halfway.
- Switch on the Dremel.
- Run the program.
- Adjust the speed slider accordingly to how the program runs.